Key takeaways
- Light texture: Best for users who want extra security without dramatically changing the factory finish.
- Rubberized texture: Provides a more locked-in feel, particularly for fingertip and claw adjustments, but may feel warm or tacky.
- Sweat-absorbing surface: Useful for warm rooms or long sessions. It can reduce the need to reposition your hand, although it will still need cleaning or replacement.
- Thicker foam-style grip: Can cushion pressure points, but may change the mouse’s effective dimensions more noticeably than a 0.5 mm sheet.
What's inside
Choosing a Razer mouse grip is less about finding the “stickiest” tape and more about matching the grip to your hand, mouse shape, and playing habits. A common mistake is buying a universal sheet without checking whether it will fit the shell. Another is choosing the thickest or most aggressive texture, only to discover that it changes the way the mouse feels, catches on a sleeve, or makes small adjustments harder.
The right grip can reduce slipping, absorb palm sweat, and make a lightweight mouse easier to control. It cannot fix an uncomfortable shape, incorrect sizing, or poor hand position. Before buying, identify whether you need pre-cut grip tape for a specific Razer model, a cut-to-fit sheet, or simply a different mouse. The following guide explains what actually matters when you are deciding how to choose the right Razer mouse grip in 2026.
As an Amazon Associate we earn from qualifying purchases at no extra cost to you. Product prices and availability are accurate as of the date shown and are subject to change.


Decide These 3 Things First
- Where do you need traction? Palm, thumb, ring finger, and fingertips often need different levels of grip. Covering every panel is not always necessary.
- How much thickness can you tolerate? Most mouse grip tape is approximately 0.5 mm thick. That is thin enough to preserve the shell shape, but it can still alter button reach and overall width.
- Is the tape for comfort or control? Sweat absorption and a softer surface help comfort. A rougher, firmer texture may improve control but can feel abrasive during long sessions.
Size and Compatibility
Start with the exact Razer mouse model, not just the product family. A DeathAdder V3 Pro, DeathAdder V4 Pro, Basilisk V3, and Basilisk V3 Pro do not necessarily share identical panel dimensions or cut lines. Even small differences around the thumb rest, side buttons, scroll wheel, or rear shell can leave edges exposed or interfere with clicks.
Pre-cut kits are usually the easiest option when they name your exact model. A cut-to-fit product offers more flexibility, but measure each panel before trimming. For a 0.5 mm sheet, leave a very small margin—about 1 mm—around buttons, seams, and the sensor area rather than wrapping tape over moving parts. A piece that is too large can lift at the edges or rub against a button.
Hand size matters too. Measure from the wrist crease to the tip of your middle finger. Hands under roughly 6.75 inches often feel more comfortable on compact shapes, while hands around 7 to 8 inches can suit medium-to-large ergonomic mice. Hands over 8 inches may benefit from fuller rear support. These are starting points, not strict rules, because fingertip, claw, and palm grips place the hand differently.
Material and Surface Texture
Mouse grip tape typically uses a textured polymer or rubber-like surface with an adhesive backing. The surface may be smooth and lightly patterned, aggressively textured, or designed to absorb perspiration. Choose based on contact time and sensitivity rather than texture alone.
- Light texture: Best for users who want extra security without dramatically changing the factory finish.
- Rubberized texture: Provides a more locked-in feel, particularly for fingertip and claw adjustments, but may feel warm or tacky.
- Sweat-absorbing surface: Useful for warm rooms or long sessions. It can reduce the need to reposition your hand, although it will still need cleaning or replacement.
- Thicker foam-style grip: Can cushion pressure points, but may change the mouse’s effective dimensions more noticeably than a 0.5 mm sheet.
Look for a surface that remains comfortable after several minutes of continuous contact. If you have sensitive skin, avoid assuming that the roughest pattern is the best. A grip should improve control without creating hot spots on the thumb or palm.
Construction and Installation
Construction determines how neatly the grip fits and how long it remains usable. A thin sheet with cleanly cut holes for side buttons and the sensor is usually easier to install than a thick, heavily contoured kit. For universal sheets, check whether the material can be cut with ordinary scissors or a sharp craft knife without fraying or stretching.
Before applying tape, clean the mouse with a small amount of isopropyl alcohol on a lint-free cloth, then let the shell dry completely. Do not soak the mouse or allow liquid near switches, ports, or seams. Apply one panel at a time, starting at a straight edge and pressing outward to limit bubbles.
Do not stretch the tape while installing it. Stretching can pull the material back from curved edges later. Press each section firmly for 10 to 20 seconds, especially around corners. Wait at least several hours before heavy use so the adhesive can settle. If the kit includes separate pieces, keep them organized before removing the backing; confusing left and right side panels is an easy way to waste a cut piece.
Comfort and Performance
The best grip is the one that supports your natural hand position without forcing a new one. Palm users often benefit from coverage on the rear shell and outer sides, where sweat and pressure can make the mouse slide. Claw users may prefer side panels and the rear edge. Fingertip users generally need traction on the sides and front contact points, while a full-shell application may feel restrictive.
Consider the tape’s effect on button access. Adding 0.5 mm to a side panel can make the mouse feel slightly wider. That may be helpful if your thumb slips, but uncomfortable if your thumb already rests close to the side buttons. Tape around the primary buttons can also change the tactile impression, so many buyers cover only the palm and sides first.
Weight is another consideration. A thin grip kit usually adds only a small amount, but the exact increase depends on coverage and material. On an ultralight mouse weighing about 55 to 65 grams, even a few extra grams may be noticeable. On a wired ergonomic mouse weighing around 90 to 100 grams, the change is less significant. Avoid claiming that grip tape improves aim automatically; it can improve consistency for some users, but technique and fit remain more important.
Price Tiers
Grip tape is a relatively inexpensive upgrade, but prices vary according to coverage, texture, and model-specific cutting.
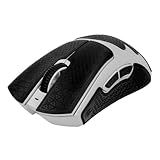
- Budget: $7 to $12: Usually a thin cut-to-fit or model-compatible sheet. The TALONGAMES DeathAdder V3 Pro and Basilisk V3/Basilisk V3 Pro examples are priced at $9.99, with 0.5 mm material and sweat-absorption claims.
- Midrange: $12 to $20: Often includes more extensive coverage, a more specialized texture, extra pieces, or improved cutting accuracy. Confirm what is actually included rather than paying for packaging or branding.
- Premium: $20 to $35 or more: May include multiple texture options, replacement pieces, application tools, or high-coverage kits. It is worthwhile only if the fit and surface are meaningfully better for your mouse.
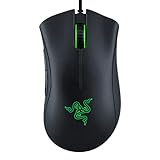
For comparison, an entry-level replacement mouse such as the Razer DeathAdder Essential may cost about $20 to $30; the example price is $20.98. If your current mouse has double-clicking, sensor problems, a damaged cable, or an uncomfortable shape, buying a grip kit may not be the best use of the money.
Warranty and Replacement Support
Check the seller’s return policy before opening the package. Adhesive products may be difficult to return after the backing is removed, and a grip that has been trimmed cannot usually be resold. Confirm whether the policy covers incorrect model fit, damaged material, missing pieces, or only unopened products.
Also look for clear manufacturer contact information and replacement-piece availability. A small defect in one panel should not require buying an entirely new kit. Do not assume that the warranty for the Razer mouse covers third-party grip tape; these are separate products with separate terms. Save the order confirmation and photograph the pieces before installation if the kit is expensive.
Delivery and Assembly
Grip tape normally requires no tools beyond scissors, a lint-free cloth, and cleaning alcohol, but installation time varies. A pre-cut kit may take 10 to 20 minutes to apply. A universal sheet can take 20 to 40 minutes once you measure, mark, and trim each panel. Add several hours of curing time before gaming.
Check the delivery listing for the actual contents: one sheet, multiple pre-cut pieces, an installation card, a cleaning wipe, or replacement strips. Make sure the package includes enough material for your intended coverage. If you need the mouse for a tournament, class, or work deadline, order at least a week ahead rather than relying on a last-minute delivery estimate.
Spec Checklist
| Spec | Budget | Mid | Premium |
|---|---|---|---|
| Typical price | $7–$12 | $12–$20 | $20–$35+ |
| Thickness | About 0.5 mm | About 0.5–1.0 mm | About 0.5–1.5 mm, often with options |
| Fit | Cut-to-fit or basic model match | Model-specific panels | Detailed model-specific coverage |
| Coverage | Key contact areas | Sides, palm, and selected buttons | Full shell or multiple coverage layouts |
| Installation time | 15–40 minutes | 10–30 minutes | 10–30 minutes |
| Best for | Testing grip tape cheaply | Regular gaming and sweat control | Specific texture, coverage, or replacement support |
Red Flags
- The listing says “Razer compatible” but does not name your exact model.
- There are no measurements, thickness details, or photos showing the panel layout.
- The tape covers the sensor, charging contacts, ventilation openings, or moving buttons.
- The adhesive is described as permanent with no guidance for removal.
- The surface texture is advertised as “maximum grip” without comfort or cleaning information.
- The seller provides no return terms for miscut, damaged, or incomplete kits.
- The product adds substantial foam thickness but gives no information about altered button height or shell dimensions.
FAQ
Is 0.5 mm grip tape thick enough for a Razer mouse?
For most users, 0.5 mm is a practical starting point. It adds traction while preserving much of the original shell shape. Choose thicker material only if you specifically want cushioning or need to increase the effective size of a panel.
Should I cover the entire Razer mouse?
No. Start with the palm and side panels where slipping occurs most. Partial coverage reduces installation time, preserves the factory feel on buttons, and makes it easier to identify whether the material helps.
Can grip tape damage the mouse finish?
Most removable products are designed for mouse shells, but adhesive behavior varies with heat, age, surface coating, and storage conditions. Apply it to a clean, dry surface, avoid leaving it on indefinitely, and remove it slowly rather than pulling upward sharply.
How often should I replace Razer mouse grip tape?
Replace it when the texture becomes smooth, the edges lift, the surface stays dirty after cleaning, or the adhesive begins to move. Heavy users may need replacement after several months, while occasional users may get longer service. Inspect the edges every few weeks and keep the surface clean with a lightly dampened cloth.