Key takeaways
- CPU and motherboard must share a socket (AM5 for modern Ryzen, LGA 1851 for the latest Intel). The board also dictates RAM type and how many drives and cards you can add.
- GPU is your biggest gaming lever and usually your biggest single cost. Make sure your case has clearance for its length.
- RAM should be a matched dual-channel kit of DDR5; 32GB is the 2026 sweet spot for gaming.
- Storage means an NVMe SSD as your boot and game drive. Nothing else feels as fast day to day.
- PSU supplies clean power to everything; buy quality here because it protects every other part.
What's inside
- Watch: How to Build a Gaming PC (2026 Beginner’s Guide) — Video Review
- Plan Your Parts List Around One Target Resolution
- Understand How the Core Components Work Together
- Assemble in the Right Order
- Cable Management and Airflow Matter More Than You Think
- First Boot, BIOS, and Drivers
- Tips
- Related Guides
- Frequently Asked Questions
- Conclusion
- Related Articles
- Related Guides
Building your own gaming PC in 2026 is the single best way to squeeze real performance out of every dollar you spend. Instead of paying for someone else’s labor and markup, you pick each part to match the games you actually play, the resolution you game at, and the room you have to grow later. It sounds intimidating the first time, but a modern PC really does go together like high-stakes LEGO: parts are keyed so they only fit one way, and the hard problems have mostly been engineered out of the process.
- Watch: How to Build a Gaming PC (2026 Beginner’s Guide) — Video Review
- Plan Your Parts List Around One Target Resolution
- Understand How the Core Components Work Together
- Assemble in the Right Order
- Cable Management and Airflow Matter More Than You Think
- First Boot, BIOS, and Drivers
- Tips
- Related Guides
- Frequently Asked Questions
- Conclusion
- Related Articles
- Related Guides
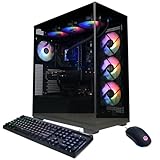
This guide walks you through the full build from choosing parts to the first boot, in the order you’ll actually do them. You’ll learn how the core components relate to one another, what order to install them, and the small mistakes that trip up first-time builders. If you decide partway through that you’d rather skip the assembly, the picks below are strong prebuilt systems that use the same class of hardware we recommend building around.
As an Amazon Associate we earn from qualifying purchases at no extra cost to you. Product prices and availability are accurate as of the date shown and are subject to change.




⚡ Save on Your Next PC — Amazon Prime
Prime members get fast free shipping on the systems above, plus early access to Prime Day & Black Friday PC deals. New members get a 30-day free trial.
Watch: How to Build a Gaming PC (2026 Beginner’s Guide) — Video Review
Plan Your Parts List Around One Target Resolution
Every good build starts with a single question: what resolution and frame rate are you building for? A 1080p 144Hz esports rig, a 1440p high-refresh all-rounder, and a 4K showcase machine have very different budgets and bottlenecks. Pick one target first, then choose the GPU that hits it, and build the rest of the system to keep that GPU fed. Prebuilt reference points like the KOTIN Prebuilt Gaming PC with an RTX 5070 and Ryzen 7 9700X or the ZOTAC MEK with an RTX 5060 show the kind of CPU-GPU pairing that stays balanced at 1440p, and they’re a useful sanity check for your own parts list.
Understand How the Core Components Work Together
- CPU and motherboard must share a socket (AM5 for modern Ryzen, LGA 1851 for the latest Intel). The board also dictates RAM type and how many drives and cards you can add.
- GPU is your biggest gaming lever and usually your biggest single cost. Make sure your case has clearance for its length.
- RAM should be a matched dual-channel kit of DDR5; 32GB is the 2026 sweet spot for gaming.
- Storage means an NVMe SSD as your boot and game drive. Nothing else feels as fast day to day.
- PSU supplies clean power to everything; buy quality here because it protects every other part.
Assemble in the Right Order
Work outside the case first. Mount the CPU, RAM, and M.2 SSD onto the motherboard while it sits on its box, because everything is easier to reach with nothing in the way. Attach the CPU cooler next, then lower the populated board into the case and secure it to the standoffs. Install the power supply, route its cables, and only then seat the graphics card into the top PCIe slot. Connect the front-panel headers, fans, and power cables last. Doing it in this sequence means you’re never fighting for space around a part you already installed.
Cable Management and Airflow Matter More Than You Think
A tidy build isn’t just for looks. Routing cables behind the motherboard tray keeps them out of the airflow path, and a simple front-to-back airflow plan (intake fans in front, exhaust at the rear and top) keeps your CPU and GPU cool under load. Cooler parts boost higher and last longer, so spend ten extra minutes tucking cables and setting fan direction before you close the side panel.
First Boot, BIOS, and Drivers
When you press power the first time, expect the system to POST and drop you into the BIOS. Enable your memory’s XMP or EXPO profile so the RAM runs at its rated speed instead of a slow default, confirm the boot drive is detected, then install Windows from a USB stick. Once you’re on the desktop, install the latest GPU driver and chipset drivers before anything else. Skipping these is the most common reason a brand-new build feels slower than it should.
Tips
- Build on a hard, non-carpeted surface and touch the case metal often to discharge static before handling parts.
- Buy a motherboard with a BIOS-flashback button if you’re using a brand-new CPU, so you can update firmware without a working chip installed.
- Install only one stick of RAM in the correct slot for troubleshooting if the system won’t POST, then add the rest.
- Keep every manual and the tiny screw bags until the build boots successfully; you’ll reach for the standoff and M.2 screws constantly.
Frequently Asked Questions
How long does a first PC build take?
Budget a relaxed afternoon, roughly three to four hours for your first build. Experienced builders finish in under an hour, but rushing is how cables get missed and screws get overtightened.
Do I need a lot of tools?
Almost none. A single Phillips #2 screwdriver handles ninety percent of the job. A magnetic tip and a small flashlight make it easier, and thermal paste comes pre-applied on most coolers.
Is building really cheaper than buying prebuilt?
At the mid and high end you usually get more performance per dollar and better parts by building. At entry level the gap narrows, which is why a well-specced prebuilt can be a smart shortcut if your time is tight.
What if it doesn’t turn on the first time?
Don’t panic. Ninety percent of no-boot issues are a loose power cable, unseated RAM, or the front-panel power header in the wrong spot. Recheck those three before assuming a part is dead.
Conclusion
A gaming PC is nothing more than a handful of well-matched parts installed in a sensible order, and once you’ve done it once the mystery disappears for good. Plan around a single resolution target, keep your components balanced, take your time with cabling and BIOS setup, and you’ll end up with a machine that’s easier to upgrade and repair than anything off a shelf. And if assembly isn’t for you this round, the prebuilt picks above deliver the same tier of hardware ready to game out of the box.