Key takeaways
- Calibrating on a dirty or damp pad. Clean and fully dry the surface first.
- Using a profile meant for glass, aluminum, or hard plastic. These surfaces reflect light differently than woven cloth.
- Changing DPI, in-game sensitivity, polling rate, and lift-off distance all at once. You will not know which change solved—or caused—the problem.
- Testing only in one small area. A worn center section may track differently from a fresh edge section.
- Ignoring loose threads and lifted pad edges. Physical damage can snag mouse feet and interrupt smooth movement.
- Assuming every tracking problem is calibration. Low battery, wireless interference, worn feet, and a failing sensor can produce similar symptoms.
A cloth mouse pad can feel smooth and controlled, but its woven surface is more variable than hard plastic or glass. If your Razer mouse sensor is not calibrated for that texture, you may notice uneven tracking, sudden cursor jumps, inconsistent lift-off behavior, or a crosshair that feels slightly “floaty” in games. Calibration helps the sensor read the pad’s surface more reliably so your chosen DPI and sensitivity feel consistent.
The process is quick, but preparation matters. Dust, loose threads, a curled edge, or a pad that shifts under your hand can make a good mouse seem faulty. The steps below work for most current Razer mice that support mouse-mat calibration through Razer Synapse in 2026.
As an Amazon Associate we earn from qualifying purchases at no extra cost to you. Product prices and availability are accurate as of the date shown and are subject to change.

What You Need
| Item | Why | Optional? |
|---|---|---|
| Compatible Razer mouse | Needed to access sensor and calibration settings in Razer Synapse. | No |
| Windows PC with Razer Synapse installed | Lets you update the mouse, select a mouse-mat profile, and adjust lift-off settings. | No |
| Clean cloth mouse pad | Calibration is only as accurate as the surface the sensor sees every day. | No |
| Microfiber cloth or soft brush | Removes dust, hair, and crumbs around the sensor opening and pad surface. | Yes, but recommended |
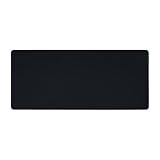
| Razer Gigantus V2 cloth pad | A stable, consistent cloth option. The Medium is commonly priced around $9.99; the XXL is around $26.98. | Yes |
| USB cable or charged battery | Prevents the mouse from disconnecting during setup, especially with wireless models. | Yes, but recommended |
Step-by-Step
-
Prepare the cloth pad and desk surface (3–5 minutes)
Place the mouse pad on a flat, solid desk. Smooth it from the center outward to remove ripples and confirm that the non-slip base is gripping the desk. The pad should not slide when you make a fast swipe.
For an XXL pad, make sure desk items are not pressing into the fabric or creating a raised section beneath it. On a medium pad, leave enough open surface for your normal gaming or work movement. If you regularly sweep 12 to 18 inches across the pad, do not calibrate in a tiny clear spot and then use a different, worn area afterward.
Brush away crumbs and hair, then wipe the surface lightly with a dry microfiber cloth. Avoid calibrating on a damp pad. Moisture can temporarily darken or change the texture of cloth fibers, which may affect sensor behavior.
-
Clean the mouse sensor area (2 minutes)
Turn off a wireless mouse or unplug a wired model before cleaning it. Flip it over and inspect the sensor opening, the surrounding ring, and the mouse feet. Use a dry microfiber cloth, camera-lens brush, or a gentle puff of air to remove visible lint.
Do not push a cotton swab, tissue corner, or metal tool into the sensor opening. Fibers can catch inside, while excess pressure can scratch the lens area. Also check the PTFE feet: if they are peeling, deeply scratched, or packed with dirt, tracking can remain inconsistent even after calibration.
-
Connect the mouse and open Razer Synapse (2–4 minutes)
Connect the mouse directly to the computer when possible. For wireless models, use a sufficiently charged battery or plug in the charging cable during setup. Open Razer Synapse and select your mouse from the device list.
If the mouse does not appear, confirm that Synapse is running, reconnect the USB receiver or cable, and try another USB port. A direct port on the computer is preferable to an unpowered hub for troubleshooting. Let Synapse finish any available device or firmware update before calibrating; settings menus can vary by mouse generation and software version.
-
Find the calibration or mouse-mat settings (1–2 minutes)
Within the mouse settings, look for a section labeled Calibration, Mouse Mat, Smart Tracking, or a similar sensor-related option. Some Razer models offer a list of recognized Razer mats, while others provide smart surface tracking or manual lift-off controls.
If your exact mat is listed, choose the matching model and surface type. If you use a different cloth pad, select the closest cloth option if available, or use the smart/manual calibration process. Do not choose a hard mat profile for a fabric pad just because it is the only named option you recognize.
-
Select the appropriate cloth-pad profile (1 minute)
For a Razer Gigantus V2, choose its matching profile if Synapse provides one. If not, select a general cloth-surface setting or proceed with Smart Tracking. The Gigantus V2’s woven cloth face and rubberized base are designed to stay stable, but the Medium and XXL sizes do not require separate sensor settings; the surface material matters more than pad size.
Save or apply the selection before moving on. If Synapse asks you to set a profile to the mouse’s onboard memory, do so if you use the same mouse with another computer. Keep in mind that software-only settings may not follow the mouse to every device.
-
Run manual calibration if your mouse offers it (2–3 minutes)
Follow the on-screen instructions exactly. Typically, this means keeping the mouse flat and moving it steadily across the cloth pad in several directions. Use normal hand pressure. Do not tilt the mouse, lift it repeatedly, or drag it over a stitched edge during the process.
Make broad figure-eight movements or slow horizontal and vertical passes, depending on the prompt. Cover the central area where you actually play or work. Fast, jerky movement can create an unreliable reading, so aim for smooth motion rather than speed.
-
Adjust lift-off distance only if needed (2–3 minutes)
Lift-off distance is the height at which the sensor stops tracking when you raise the mouse. Lower settings usually suit low-sensitivity players who frequently reposition their mouse, because the cursor is less likely to move while the mouse is in the air.
Start at the default or medium setting. Test by moving the mouse slowly, then lifting it about 1/8 to 1/4 inch above the pad. If the cursor keeps traveling too far after you lift, reduce the lift-off setting one step. If tracking cuts out during normal movement while the mouse is still flat, raise it one step. Change only one setting at a time.
-
Test at your usual DPI and save the result (3–5 minutes)
Test the mouse in the game, design application, or desktop workflow you use most. Make slow circles, diagonal sweeps, quick flicks, and several lift-and-reset motions. The cursor should move smoothly without skipping, spinning out, or continuing to track noticeably after lift-off.
Keep your usual DPI for this test. Changing from 800 DPI to 3,200 DPI immediately afterward can make the mouse feel different even when calibration is correct. Once it feels right, save the profile and give it a clear name, such as “Cloth Pad – 800 DPI.”
Mistakes to Avoid
- Calibrating on a dirty or damp pad. Clean and fully dry the surface first.
- Using a profile meant for glass, aluminum, or hard plastic. These surfaces reflect light differently than woven cloth.
- Changing DPI, in-game sensitivity, polling rate, and lift-off distance all at once. You will not know which change solved—or caused—the problem.
- Testing only in one small area. A worn center section may track differently from a fresh edge section.
- Ignoring loose threads and lifted pad edges. Physical damage can snag mouse feet and interrupt smooth movement.
- Assuming every tracking problem is calibration. Low battery, wireless interference, worn feet, and a failing sensor can produce similar symptoms.
How Often
Calibrate whenever you switch to a new mouse pad, move from a hard surface to cloth, or notice a persistent change in tracking. For a stable setup, recalibration every 3 to 6 months is usually sufficient. Recalibrate sooner after washing the pad, spilling something on it, replacing mouse feet, installing a major mouse firmware update, or changing to a noticeably different desk surface underneath the pad.
You do not need to recalibrate every week unless your setup changes often. Frequent adjustments can lead to chasing small differences that come from fatigue, game settings, or normal cloth wear rather than the sensor.
When to Call a Pro or Replace
Most mouse-sensor issues do not require professional repair. First, test the mouse on another clean cloth pad and, if possible, another computer. If it skips on multiple surfaces after cleaning, updating, and resetting settings, contact Razer support or the retailer if the mouse is within its warranty period.
Replace the cloth pad when the surface has permanent shiny patches, deep stains, fraying, curled corners that will not lie flat, or a base that slides during normal use. Replace mouse feet when they are visibly uneven, scratched through, or peeling. Consider replacing the mouse if the sensor intermittently disconnects, the cursor jumps on several known-good surfaces, or physical damage is visible around the sensor opening.
FAQ
Do all Razer mice have cloth-pad calibration?
No. Calibration controls vary by model and sensor generation. Some mice offer named mouse-mat profiles, some use Smart Tracking, and some provide only basic lift-off-distance controls. If your model has no calibration menu, clean the sensor and pad, then use the available DPI and lift-off settings.
Should I use a Razer mat profile for a non-Razer cloth pad?
You can use the closest cloth profile as a starting point, but a general cloth setting or Smart Tracking option is usually better when available. Fine weave, thickness, color, coating, and wear level differ among pads.
Why does my cursor still skip after calibration?
Check for lint in the sensor opening, a damaged mouse foot, a wrinkled pad, low wireless battery, USB interference, or an overly high lift-off setting. Test on a second clean surface before deciding the sensor is defective.
Will calibration change my DPI?
Calibration should not intentionally change the DPI number you selected. Instead, it helps the sensor interpret the pad surface and lift-off behavior more consistently. If the mouse suddenly feels much faster or slower, verify the active DPI stage and in-game sensitivity before recalibrating.