Key takeaways
- Do not machine-wash or soak the pads. Water can remain trapped in foam for days and may damage adhesives or plastic components.
- Do not use a hair dryer. Hot air can shrink fabric, deform foam, and loosen bonded seams.
- Do not spray cleaner on the ear cup. Liquid can travel through seams, buttons, microphone openings, or the speaker grille.
- Do not scrub aggressively. Rough brushing can raise the nap, create a bald patch, or pull stitches.
- Do not use alcohol unless Razer specifically approves it for your exact material. It may damage coatings and mixed-material cushions.
- Do not reinstall damp cushions. Trapped moisture encourages odor and can migrate into the headset.
Fabric ear cushions on a Razer headset absorb sweat, skin oil, hair products, dust, and food particles every time you wear them. If you clean them too aggressively, however, you can flatten the padding, loosen the fabric, stain the mesh, or send moisture into the speaker housing. The safest approach is gentle surface cleaning with very little water, followed by thorough air-drying.
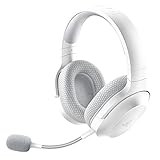
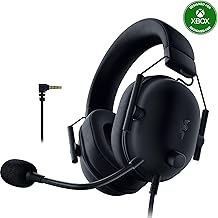
This method works for many Razer fabric or mesh-covered cushions, including removable pads on Kraken, Barracuda, and Kitty headsets. Always check your model’s manual before pulling off the cushions, since attachment methods vary. If the fabric is torn, permanently compressed, or developing an odor that remains after cleaning, replacement pads may be more practical than repeated washing. The process below is suitable for routine care in 2026 and does not require a washing machine, hair dryer, or specialty electronics cleaner.
As an Amazon Associate we earn from qualifying purchases at no extra cost to you. Product prices and availability are accurate as of the date shown and are subject to change.


What You Need
| Item | Why | Optional? |
|---|---|---|
| Two clean microfiber cloths | One for cleaning and one for drying without leaving lint | No |
| Distilled or clean lukewarm water | Provides controlled moisture and reduces mineral residue | No |
| Mild, fragrance-free dish soap | Helps break down skin oil and light grime | Optional |
| Soft-bristled toothbrush or detailing brush | Loosens dust from seams and textured fabric | Optional |
| Small bowl | Lets you dilute a very small amount of soap | Optional |
| Plastic pry tool or clean fingertips | Helps remove a cushion without scratching the housing | Optional |
| Replacement cushions | Useful when existing pads are damaged, flattened, or permanently stained | Optional |
For replacement options, Geekria Comfort Mesh Fabric Replacement Ear Pads are listed for several Razer models, including Kraken V4, V4 X, V4 Pro, Kitty V2 Pro, Barracuda, and Barracuda X. The listed price is about $15.99. SOULWIT replacement cushions for models such as the Kraken Pro V2, Kraken 7.1 V2, and Kraken Stormtrooper are listed at about $20.95. Confirm the exact model and attachment style before ordering; a cushion that looks similar may not fit the retaining ring or ear-cup depth.
Step-by-Step
1. Power down and disconnect the headset (2 minutes)
Turn the headset off, unplug the USB, 3.5-millimeter cable, or wireless receiver, and remove any charging cable. If the headset has a detachable microphone, take it off. Place the headset on a clean towel with the ear cups facing upward.
Do not clean while the headset is charging or connected to a computer. Disconnecting it prevents accidental button presses and reduces the chance of moisture reaching a powered circuit.
2. Check whether the cushions are removable (3 minutes)
Inspect the edge of each ear cushion. Many Razer pads are held by a lip that fits around a plastic mounting ring. Others may use clips, adhesive, or a cover that should not be pulled off by the user.
Start at the bottom edge and gently roll the cushion’s outer lip away from the ear cup using your fingertips. If necessary, use a smooth plastic pry tool—not a knife, screwdriver, or metal pick. Work around the rim gradually rather than yanking one section. Stop if the fabric begins to stretch, the foam tears, or the mounting ring starts to lift.
You can clean cushions in place, but removal makes it easier to reach the inner rim and prevents water from running toward the speaker grille.
3. Remove loose dust and hair (3 to 5 minutes)
Hold the cushion over a trash can and gently pat the fabric with your fingers. Use a dry microfiber cloth or soft brush to lift surface dust, hair, and crumbs. Brush in one direction with light pressure, especially around seams.
A vacuum can be used only on its lowest setting with the nozzle held several inches away. Do not press a powerful vacuum directly onto the fabric. Suction can pull at stitching, deform soft foam, or stress a thin mesh cover.
4. Mix a mild cleaning solution (1 minute)
Fill a small bowl with about 1 cup of lukewarm water. If the cushions are oily or visibly dirty, add only one or two drops of fragrance-free dish soap. The solution should feel barely soapy. Avoid bleach, alcohol, hydrogen peroxide, ammonia, fabric softener, disinfectant wipes, and concentrated upholstery cleaners. These products can discolor fabric, dry out synthetic leather edges, or leave residue that irritates skin.
5. Spot-test an inconspicuous area (5 minutes)
Dampen a corner of the microfiber cloth with the diluted solution and wring it until it is only slightly moist. Test a small area on the underside or rear edge of the cushion. Wait several minutes and check for color transfer, bleeding, stiffness, or a change in texture.
If the fabric reacts poorly, use plain water instead. For brightly colored cushions or older fabric, allow the test area to dry completely before cleaning the visible surface.
6. Clean the fabric gently (5 to 10 minutes per cushion)
Work in small sections. Blot and lightly wipe the surface rather than scrubbing back and forth. Concentrate on the areas that touch your face, jaw, and hair, then clean the outer rim and seams. A soft toothbrush can loosen grime from stitching, but use short, gentle strokes.
Never pour or spray liquid directly onto the cushion. Keep the cloth damp—not wet—and avoid pressing hard enough to soak through to the foam. If a stain does not lift after two or three light passes, leave it rather than escalating to a harsh chemical.
7. Remove soap residue (2 to 4 minutes)
Rinse the cloth thoroughly with clean water, wring it very well, and wipe the cushion once or twice. This removes leftover soap that could make the fabric stiff or attract more dust. Do not saturate the pad during rinsing.
8. Dry completely before reinstalling (at least 8 hours)
Press the cushion between dry microfiber cloths to absorb moisture. Do not twist, wring, or compress the foam. Set the pads in a well-ventilated room at normal indoor temperature, ideally on a clean rack or towel with space around them.
Allow at least 8 hours of drying time; thick foam may need 24 hours. Keep the pads away from direct sunlight, radiators, heat vents, and hair dryers. Excess heat can warp foam and weaken adhesive. Never reinstall a cushion that feels cool, damp, or heavier than normal.
9. Reattach and inspect (2 to 5 minutes)
Align the cushion with the ear cup and tuck its mounting lip evenly around the retaining ring. Work around the circumference until there are no loose sections or folds. Check that the fabric does not cover the speaker opening and that both cushions sit at the same height.
Reconnect the headset and play audio at low volume first. Confirm that both channels sound normal and that the cushion does not rattle or shift.
Mistakes to Avoid
- Do not machine-wash or soak the pads. Water can remain trapped in foam for days and may damage adhesives or plastic components.
- Do not use a hair dryer. Hot air can shrink fabric, deform foam, and loosen bonded seams.
- Do not spray cleaner on the ear cup. Liquid can travel through seams, buttons, microphone openings, or the speaker grille.
- Do not scrub aggressively. Rough brushing can raise the nap, create a bald patch, or pull stitches.
- Do not use alcohol unless Razer specifically approves it for your exact material. It may damage coatings and mixed-material cushions.
- Do not reinstall damp cushions. Trapped moisture encourages odor and can migrate into the headset.
How Often
For daily use, wipe the cushions with a dry microfiber cloth once or twice a week and perform a damp clean about once a month. If you exercise in the headset, have oily skin, or live in a hot, humid climate, clean them every two to three weeks. Occasional users may need a full cleaning every two to three months.
Let sweat dry before storing the headset. Keep it on a stand or in a ventilated case rather than in a sealed bag immediately after use. Washing your face, drying your hair, and avoiding use with wet hair also reduce buildup.
When to Call a Pro or Replace
Professional service is sensible if liquid has entered the ear cup, the headset develops crackling or intermittent audio after cleaning, or the plastic mounting ring breaks. Stop using the headset if it becomes unusually hot, smells like burning, or behaves erratically.
Replace the cushions when the foam remains flattened, the fabric is torn, stitching has opened, the odor returns quickly, or the pads no longer create a comfortable seal. Replacement pairs commonly cost about $15 to $25, depending on the model and materials. Verify compatibility by checking the exact Razer model, ear-cup shape, mounting method, and cushion dimensions before purchasing.
FAQ
Can I wash Razer fabric ear cushions in a washing machine?
No. Machine agitation, detergent, heat, and prolonged soaking can deform the foam and damage the fabric or adhesive. Hand-clean the pads with a barely damp cloth and let them air-dry fully.
Can I clean the cushions without removing them?
Yes. Use a lightly damp microfiber cloth and keep moisture away from the ear-cup seams, controls, microphone port, and speaker grille. Removing the pads is preferable only when the attachment system allows it safely.
How do I remove a strong odor?
Clean the fabric with diluted mild soap, wipe away residue with a nearly dry water-only cloth, and air-dry for 8 to 24 hours. Avoid spraying perfume or deodorizer on the pads. If the odor returns after two cleanings, replacement foam is usually the better solution.
Are replacement ear cushions worth buying?
Usually, yes, when the original pads are compressed, torn, or uncomfortable. Mesh replacement sets around $15.99 and foam-focused sets around $20.95 can restore comfort for less than replacing an otherwise functional headset. Match the replacement to your exact Razer model before ordering.