Key takeaways
- Group by destination, not origin: Keep motherboard power, CPU power, and front I/O on separate channels behind the tray to avoid a single bulky bundle.
- Leave 2 to 3 inches of slack at each end for panel removal and component swaps. Tight cables stress connectors and pull out over time.
- Route thick cables first. Lay the 24-pin and GPU cables, then fill gaps with thinner fan and RGB wires.
- Test-fit side panels before permanent ties. If the panel bows, your bundle is too thick — split it into two flatter runs.
What's inside
- Watch: How to Cable Manage Your Gaming PC — Video Review
- 1. Plan Your Routes Before You Tie Anything
- 2. Tame External Cables Under and Behind Your Desk
- 3. Organize Inside the Case for Airflow and Aesthetics
- 4. Protect and Bundle High-Traffic Runs
- 5. Final Power and Peripheral Cleanup
- Tips
- Frequently Asked Questions
- Conclusion
- Related Articles
A messy gaming PC does more than look bad. Loose cables block front-to-back airflow, raise GPU and CPU temperatures by 3-6°C, trap dust, and make every upgrade a frustrating tangle. With tempered glass panels, vertical GPU mounts, and high-wattage 12VHPWR connectors now standard in 2026, every wire is on display and airflow is more critical than ever. Clean routing is not cosmetic — it is part of building a cooler, quieter, and more reliable system.
- Watch: How to Cable Manage Your Gaming PC — Video Review
- 1. Plan Your Routes Before You Tie Anything
- 2. Tame External Cables Under and Behind Your Desk
- 3. Organize Inside the Case for Airflow and Aesthetics
- 4. Protect and Bundle High-Traffic Runs
- 5. Final Power and Peripheral Cleanup
- Tips
- Frequently Asked Questions
- Conclusion
- Related Articles
This guide walks you through a complete cable management workflow, inside your case and around your desk. You do not need custom tools or a full rebuild. With a plan, a few key organizers, and about 45 to 90 minutes, you can transform a rat’s nest into a serviceable, dust-resistant build that is easy to upgrade later.
As an Amazon Associate we earn from qualifying purchases at no extra cost to you.


⚡ Save on Your Next PC — Amazon Prime
Prime members get fast free shipping on the systems above, plus early access to Prime Day & Black Friday PC deals. New members get a 30-day free trial.
Watch: How to Cable Manage Your Gaming PC — Video Review
1. Plan Your Routes Before You Tie Anything
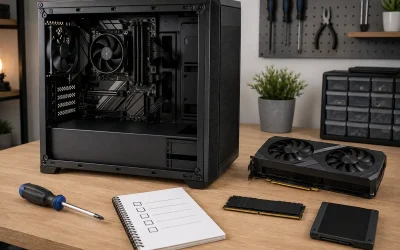
Do not start with zip ties. Start with a map. Power down, unplug, and take a photo of the back of your motherboard tray before you move anything. Most modern ATX and micro-ATX cases offer 18 to 25mm of clearance behind the tray, 3 to 6 rubber grommets, and tie-down points every 80 to 100mm. Identify where your 24-pin ATX, 8-pin EPS, PCIe, front panel, and SATA cables naturally want to run.
- Group by destination, not origin: Keep motherboard power, CPU power, and front I/O on separate channels behind the tray to avoid a single bulky bundle.
- Leave 2 to 3 inches of slack at each end for panel removal and component swaps. Tight cables stress connectors and pull out over time.
- Route thick cables first. Lay the 24-pin and GPU cables, then fill gaps with thinner fan and RGB wires.
- Test-fit side panels before permanent ties. If the panel bows, your bundle is too thick — split it into two flatter runs.
2. Tame External Cables Under and Behind Your Desk
External clutter is where most gaming setups fail. Monitors, speakers, USB hubs, Ethernet, and power bricks can easily mean 10 to 15 cables leaving your desk. The goal is one or two invisible trunks, not a dozen individual dangling wires.
- Use split wire sleeves for the main trunk. A 4-pack of split sleeves lets you separate power from video and USB data, which reduces electromagnetic interference and makes troubleshooting faster. The N NOROCME 192 PCS Cable Management Kit includes 4 wire organizer sleeves plus 35 cord clips and 100 fastening ties, which is ideal for bundling a dual-monitor and PC-to-wall run into a single clean spine.
- Anchor along the desk edge and legs. Self-adhesive clips hold best on clean, flat surfaces — wipe with isopropyl alcohol and let cure for 12 hours before loading. The Cord Management Organizer Kit 192PCS with 41 adhesive clips and 2 rolls of self-adhesive straps gives you enough points to space clips every 8 to 12 inches without drilling.
- For large setups, scale up. The 311Pcs Cable Management Organizer Kit with 4 split sleeves, 53 cable clips, and 200 fastening ties is built for multi-PC or streaming desks with capture cards, lighting, and audio gear. Use the larger cord holder clips for thick power strips and the smaller clips for DisplayPort and USB runs.
- Go heaviest under the desk. The 494 PCS Cable Management Kit with 4 split sleeves, 130 adhesive clips, 6 cable holders, and 300 ties with 50 mounts is designed for full under-desk concealment. Mount your power strip to the underside of the desk and run the trunk directly into its center so no cables touch the floor.
3. Organize Inside the Case for Airflow and Aesthetics
Inside the case, airflow and serviceability are the priorities. You want unobstructed intake from front to exhaust at the rear and top, with no cables hovering over fans or resting on hot backplates.
- Use the back chamber for bulk. Fold excess PSU cable length in a flat S-pattern behind the motherboard tray, not balled up in the PSU shroud. Secure with reusable Velcro straps every 100 to 120mm instead of single-use zip ties so you can re-route later.
- Keep fan and RGB wires on the front side of the tray. Daisy-chain fans before routing, and run the combined cable through the nearest grommet to the fan hub or header.
- Straighten visible power cables with combs. For tempered glass builds, the Sirlyr Black 24-PCS PSU Cable Combs Kit uses 24 combs sized for 16-18AWG cables — including 4 for the 24-pin, 4 for 12VHPWR, and 16 for 8-pin EPS/PCIe. The 3.5mm hole diameter keeps extensions perfectly parallel without pinching and instantly cleans up GPU and motherboard runs.
- Maintain clearance: Leave at least 15mm between cable bundles and any fan blade tip, and keep cables 10mm off M.2 heatsinks and VRM coolers.
4. Protect and Bundle High-Traffic Runs
Some cables take abuse — the run from PC to wall, along baseboards, or behind a desk leg where chairs roll. Thin sleeves will not survive there, and exposed power cables are a chewing risk if you have pets.
- Use split loom tubing for floor and wall runs. The Alex Tech 10ft Cord Protector Wire Loom Tubing in 1/2 inch diameter is split along its length so you can add or remove cables without unplugging. It is ideal for consolidating USB, audio, power, and Ethernet into one protected trunk from 6 to 10 feet long.
- Choose the right diameter: 1/2 inch fits 4 to 6 thin cables or 2 to 3 thick power cords. Do not overfill — you should be able to close the split with a 30 percent overlap.
- Secure loom at both ends and in the middle. Use adhesive mounts or clips to pin the loom to the desk leg or wall, then let it hang straight to the floor to avoid sagging.
- For pet owners, add an extra layer on exposed power cords. The same loom tubing prevents cats from chewing through rubber jackets and is rated for continuous use behind desks and entertainment centers.
5. Final Power and Peripheral Cleanup
Once trunks are built, do a final pass for power bricks and peripherals. This is what separates a good job from a professional-looking finish.
- Mount, do not pile. Screw or adhere your surge protector under the desk center, 2 to 3 inches back from the edge. This lifts 5 to 8 power bricks off the floor and hides them in one place.
- Label both ends. Use small flag labels or colored ties on PSU, monitor, and Ethernet runs. Future you will thank yourself when swapping a GPU at midnight.
- Separate power from data where possible. Keep AC power on one side of the desk leg and DisplayPort, HDMI, and USB 3.0 on the other to minimize interference and make cable tracing obvious.
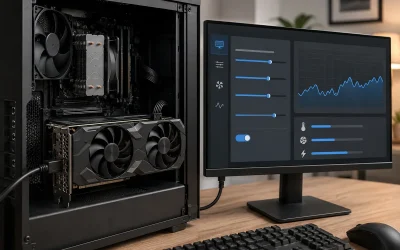
- Do a load test: With the PC on, run a game for 10 minutes and check that no cable has migrated into a fan and that exhaust temperatures are stable.
Tips
- Reuse before you cut. Use Velcro straps behind the motherboard tray and under the desk, and save zip ties for final inside-case runs you will not touch for a year. Velcro saves 15 to 20 minutes on every future upgrade.
- Clean before you stick. Adhesive clips fail on dust or textured wood grain. Wipe with 70 percent isopropyl alcohol, dry completely, press for 30 seconds, and wait overnight before loading cables.
- Think service loop, not extra length. Coil 3 to 4 inches of extra cable flat behind the tray rather than stuffing a 12-inch loop in the bottom shroud. Flat coils cool better and fit side panels easier.
- Photograph when done. Take clear photos of the rear tray and under-desk layout. If you need to add storage or RAM later, you will know exactly which clip to open without pulling everything apart.
Frequently Asked Questions
Should I use zip ties or Velcro straps inside my PC?
Use both strategically. Velcro is best behind the motherboard tray and for any bundle you may change, because it is reusable and will not overtighten and damage sleeves. Use small zip ties inside the main chamber for permanent fan and RGB bundles where you want the lowest profile. Trim zip tie tails flush with a micro-cutter to avoid sharp edges.
How tight should internal cables be?
Snug but not taut. You should be able to slide one finger under any bundle. If the cable pulls the motherboard header or GPU connector at an angle, add slack. For 12VHPWR cables, avoid sharp 90-degree bends within 35mm of the connector — a gentle curve prevents heat buildup and connector strain.
Will better cable management actually lower temperatures?
Yes, modestly but measurably. In a typical airflow case, clearing the front intake and removing bundles from in front of the GPU can improve CPU and GPU temps by 2 to 5°C and lower fan RPM by 100 to 200. More importantly, it reduces dust accumulation and keeps intake filters effective longer.
How do I keep adhesive clips from falling off?
Surface prep is everything. Adhesive holds best on smooth, non-porous surfaces like metal, glass, and melamine. Avoid raw wood, heavily textured surfaces, or dusty walls. Clean, press firmly, wait 12 to 24 hours before applying load, and avoid exceeding half the clip’s capacity. For heavy power bricks, use screw-in mounts included in larger kits like the 494 PCS Kit.
Conclusion
Great cable management is planned, layered, and reversible. Start with a routing map, build clean trunks with split sleeves and loom, anchor everything with appropriately spaced clips, and detail the visible runs with combs. Whether you need a compact 192-piece kit for a single PC or a full 494-piece system for a streaming battlestation, the right organizers turn a weekend chore into a one-time upgrade that stays clean for years. Build it tidy now, and every future GPU swap, cleaning, or move will take minutes, not hours.