Key takeaways
- Buying by color alone: “Purple,” “red,” and “linear” are not sufficient compatibility checks. Match the exact keyboard and optical switch format.
- Forcing a non-hot-swap switch: If your model is not designed for removal, pulling can damage the keyboard permanently.
- Installing the switch backward: Check the old switch’s orientation before removal and make sure the replacement sits flush.
- Testing only after replacing many switches: Test each key immediately, so you know which installation caused a problem.
- Pulling wide keycaps too aggressively: Stabilizers can bend or detach if large keycaps are twisted upward.
- Using wet cleaners inside the switch opening: Liquids can create corrosion, residue, or sensor problems.
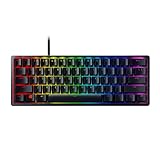
Changing switches in a Razer optical keyboard can refresh a worn-out key feel, replace a failed switch, or let you move from a loud clicky response to a smoother linear one. But it is not a universal keyboard modification. Many Razer optical boards use model-specific optical switches, and only certain versions are designed for hot-swapping. Installing an incompatible switch, forcing a switch into the plate, or opening a non-hot-swappable board can bend contacts, crack the switch housing, damage the optical sensor area, or leave keys registering inconsistently.
This guide explains how to change switches in a Razer optical keyboard safely in 2026, with a focus on compatible hot-swappable Razer Huntsman-style models. Before ordering parts, confirm your keyboard’s exact model number and switch generation. A replacement that fits one Huntsman keyboard may not fit another Razer optical board.
As an Amazon Associate we earn from qualifying purchases at no extra cost to you. Product prices and availability are accurate as of the date shown and are subject to change.


What You Need
| Item | Why | Optional? |
|---|---|---|
| Compatible Razer optical replacement switches | Replaces the defective, worn, or unwanted switch. Buy switches specifically listed for your exact keyboard model and optical switch generation. | No |
| Keycap puller | Removes keycaps without prying against the keyboard case. A wire puller is usually gentler than a rigid ring-style puller. | No |
| Optical-switch puller or narrow switch puller | Releases the switch’s retaining clips and lifts it straight from a supported hot-swap socket. | Usually |
| Small plastic pry tool | Helps release a stubborn switch without scratching the metal top plate or switch housing. | Yes |
| Compressed air or hand blower | Clears dust, hair, and crumbs from the exposed switch opening before installation. | Yes |
| Soft brush | Loosens debris around the plate and stabilizers. Use a clean, dry brush about 1/2 to 1 inch wide. | Yes |
| Small container or tray | Keeps keycaps and replacement parts organized, especially when working on several keys. | Yes |
| Computer or keyboard-testing screen | Confirms that each replacement key registers correctly before you reinstall every keycap. | No |
Replacement optical switches are commonly sold in small multipacks. Basic compatible packs may cost roughly $9 to $15, depending on quantity and switch type. Do not assume that a similarly shaped mechanical switch will work: standard MX-style mechanical switches are not interchangeable with Razer optical switches.
Step-by-Step
-
1. Confirm that your keyboard supports switch replacement (5 to 10 minutes)
Start with the label on the underside of the keyboard, its original packaging, or the product information in your Razer account. Identify the complete model name rather than relying on the general “Huntsman” name. Then verify two things: that the keyboard uses removable optical switches and that the replacement switches are made for that specific board.
If your keyboard is not explicitly described as hot-swappable, do not pull on a switch. Some optical switches are mounted or integrated in ways that require disassembly and more advanced repair. A switch that will not lift out with light, even pressure is a warning sign, not an invitation to use more force.
-
2. Shut down, unplug, and prepare the work surface (3 to 5 minutes)
Close open work, turn off the computer if convenient, and unplug the keyboard. If it has detachable USB cables, disconnect both ends. Place the keyboard on a clean table with good overhead lighting. Put down a light-colored towel or desk mat so small clips and keycaps are easy to see.
Keep drinks, cleaning sprays, and metal tools away from the keyboard. You do not need to use any power or heat for a normal hot-swap switch replacement.
-
3. Photograph the key layout and remove the keycap (2 to 4 minutes per key)
Take a quick phone photo of the keyboard before removing multiple keycaps. This is especially helpful around the navigation cluster, number pad, and function row.
Position the wire keycap puller over the keycap, slide the wires beneath opposite sides, and pull straight up slowly. Avoid twisting. For wide keys such as the Spacebar, Enter, Backspace, Shift, and Plus key, lift one side slightly and then the other. These keys may have stabilizer bars underneath, so do not yank them upward at an angle.
-
4. Inspect the exposed switch and clear debris (2 to 3 minutes)
Look at the switch from directly above. Note its orientation, including any clip positions, guide rails, and optical opening. Use a hand blower or short bursts of compressed air held upright to remove loose debris. Keep the nozzle several inches away; a distance of 4 to 6 inches is generally enough for light cleaning.
Do not drip isopropyl alcohol, water, or lubricant into the switch opening. If a spill caused the failure, the board may need deeper cleaning or professional service instead of a simple switch swap.
-
5. Release and remove the old optical switch (3 to 6 minutes)
Place the switch puller so it catches the retaining tabs on the switch housing. Squeeze gently, then pull vertically with slow, steady pressure. Keep the puller centered. If your puller does not fit, use a small plastic pry tool to depress one retaining clip at a time while lifting the switch only slightly.
Never lever against the PCB, scrape the optical sensor area, or use pliers. The switch should come out with controlled pressure on a hot-swappable model. Once removed, compare it with the replacement: the housing shape, guide features, bottom profile, and clip arrangement should match.
-
6. Align and install the replacement switch (3 to 5 minutes)
Hold the new switch in the same orientation as the old one. Align it over the opening without pressing. It should sit flat and line up naturally with the plate cutout. Press straight down with a fingertip over the center of the switch housing until it is fully seated and level with surrounding switches.
Use firm but moderate pressure. If it stops high above the plate, remove it and check alignment rather than forcing it. An incorrectly seated switch can feel crooked, interfere with the keycap, or fail to register.
-
7. Test the switch before reinstalling the keycap (2 to 4 minutes)
Reconnect the keyboard and open a text document or keyboard-testing utility. Press the exposed switch stem carefully several times. Confirm that every press registers once, releases properly, and does not produce repeated characters. If RGB lighting is part of your model, check that the LED behavior matches nearby keys.
If the key does not work, unplug the keyboard, remove the switch, inspect for debris or misalignment, and reseat it. If a second known-compatible switch also fails in the same position, the socket, PCB, or optical sensing hardware may be the problem.
-
8. Reinstall the keycap and perform a final check (2 to 5 minutes)
Align the keycap with the switch stem and press straight down until it is secure. For stabilized keys, make sure the stabilizer inserts or wire are correctly engaged before pressing the cap into place. Test the key’s travel, return, and neighboring keys. Repeat the process one key at a time if you are replacing several switches; it makes troubleshooting much easier.
Mistakes to Avoid
- Buying by color alone: “Purple,” “red,” and “linear” are not sufficient compatibility checks. Match the exact keyboard and optical switch format.
- Forcing a non-hot-swap switch: If your model is not designed for removal, pulling can damage the keyboard permanently.
- Installing the switch backward: Check the old switch’s orientation before removal and make sure the replacement sits flush.
- Testing only after replacing many switches: Test each key immediately, so you know which installation caused a problem.
- Pulling wide keycaps too aggressively: Stabilizers can bend or detach if large keycaps are twisted upward.
- Using wet cleaners inside the switch opening: Liquids can create corrosion, residue, or sensor problems.
How Often
Optical switches do not need routine replacement on a schedule. Replace them when a key stops registering, double-registers, feels noticeably different from neighboring keys, sticks after cleaning, or when you intentionally want a different compatible switch feel. For most users, a single-key replacement is an occasional repair rather than annual maintenance.
Clean the keyboard surface every 1 to 3 months if you use it daily. Removing keycaps for a deeper dry clean once or twice a year can reduce debris-related sticking. Avoid removing switches repeatedly just for cleaning, since unnecessary handling increases the chance of damaged clips or misplaced parts.
When to Call a Pro or Replace
Stop the DIY repair and consider professional service if several keys fail at once, the keyboard has liquid damage, the USB connection drops repeatedly, the board smells burnt, or a replacement switch still will not register in a known-good socket. Those symptoms point beyond a simple switch failure.
Replacement may make more sense if the PCB is cracked, multiple hot-swap positions are loose, the keyboard has extensive corrosion, or repair costs approach the price of a comparable new keyboard. If the keyboard is still under warranty, check the warranty terms before opening it or using non-original components.
FAQ
Can I put regular mechanical switches in a Razer optical keyboard?
No. Standard mechanical switches and optical switches use different contact and sensing designs. Use only switches confirmed to fit your exact Razer optical keyboard model.
Why does my replacement switch fit but not work?
The switch may be misaligned, not fully seated, incompatible with the keyboard’s optical system, or installed in a damaged socket. Remove it, inspect the opening, reinstall it carefully, and test with another known-compatible switch if available.
Do I need to solder when changing Razer optical switches?
Not on a keyboard specifically designed for hot-swappable optical switches. Models without hot-swap support may require more complex repair, and soldering should not be assumed to be a safe or appropriate solution for an optical keyboard.
Can I replace only one switch?
Yes. Replacing one failed switch is usually the simplest approach. If you change switch types across the keyboard, expect differences in sound, actuation feel, and resistance between keys unless you replace an entire typing zone or the full set.